Any browser
Point any phone, tablet, or laptop at the rig's address on port 5000. Use its hostname or its IP, and accept the self-signed certificate once.
https://<ip-or-hostname>:5000Your first night, from scope on the tripod to a finished image you can share. This is the speed run: connect the gear, guide and focus, capture with live stacking or an unattended autorun, then stack and edit in STUDIO.
Polaris runs on the rig and is driven from any device on the same network. There are two ways in.
Point any phone, tablet, or laptop at the rig's address on port 5000. Use its hostname or its IP, and accept the self-signed certificate once.
https://<ip-or-hostname>:5000Install the Android app from the Download page and open it. It scans the network and lists every Polaris instance it finds, ready to connect with one tap, no IP typing needed.
Open RIGS in the sidebar. Pick a saved rig from the dropdown, or build a new one by adding your Main Telescope (brand, model, reducer or flattener, so focal length and aperture auto-fill), Main Camera, Mount, Focuser, and Filter Wheel cards. Click Save selections so the rig remembers everything next time.
TipA rig stores focal length, gain defaults, and the PHD2 profile binding, which is the basis for framing and plate-solving.
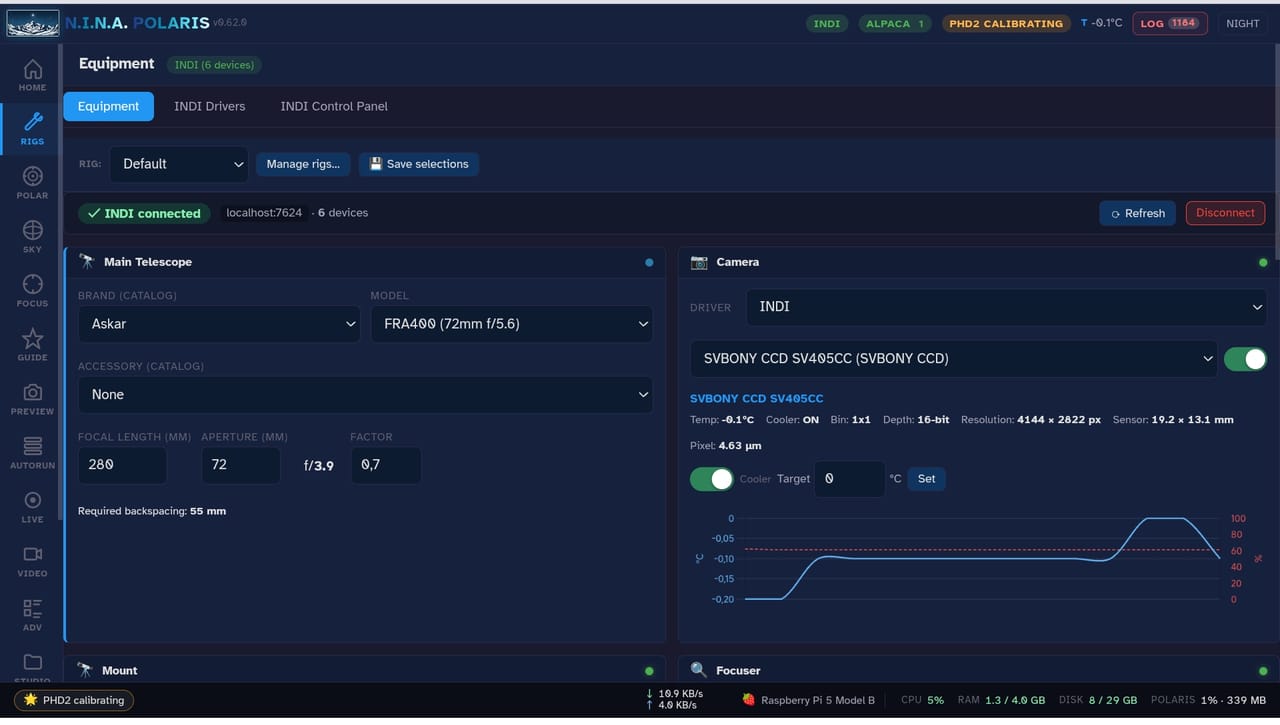
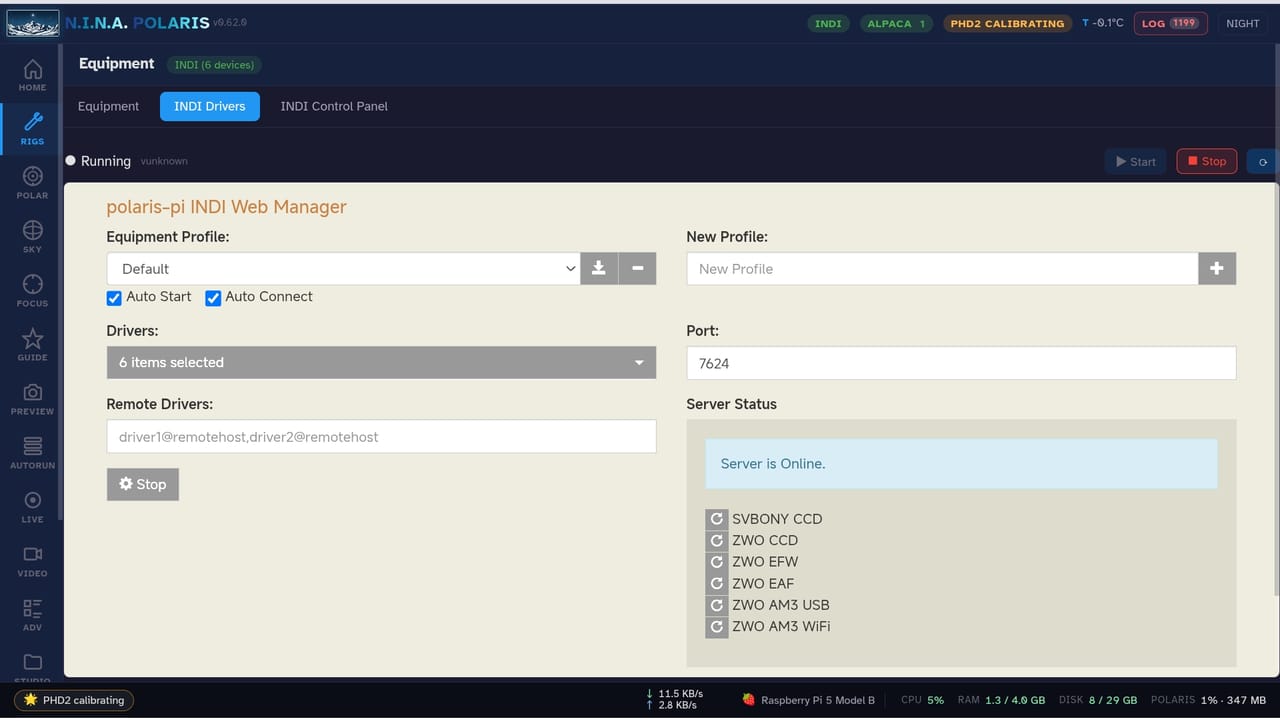
On each card, pick the device under the connection strip: INDI on Linux, ASCOM or Alpaca on Windows, or a native camera SDK. Set the camera cooler target, then hit Connect on each device. Confirm the mount is tracking and that the filter list matches your wheel.
TipAuto-discovery lists devices it finds on the LAN, so most gear shows up without typing an address.
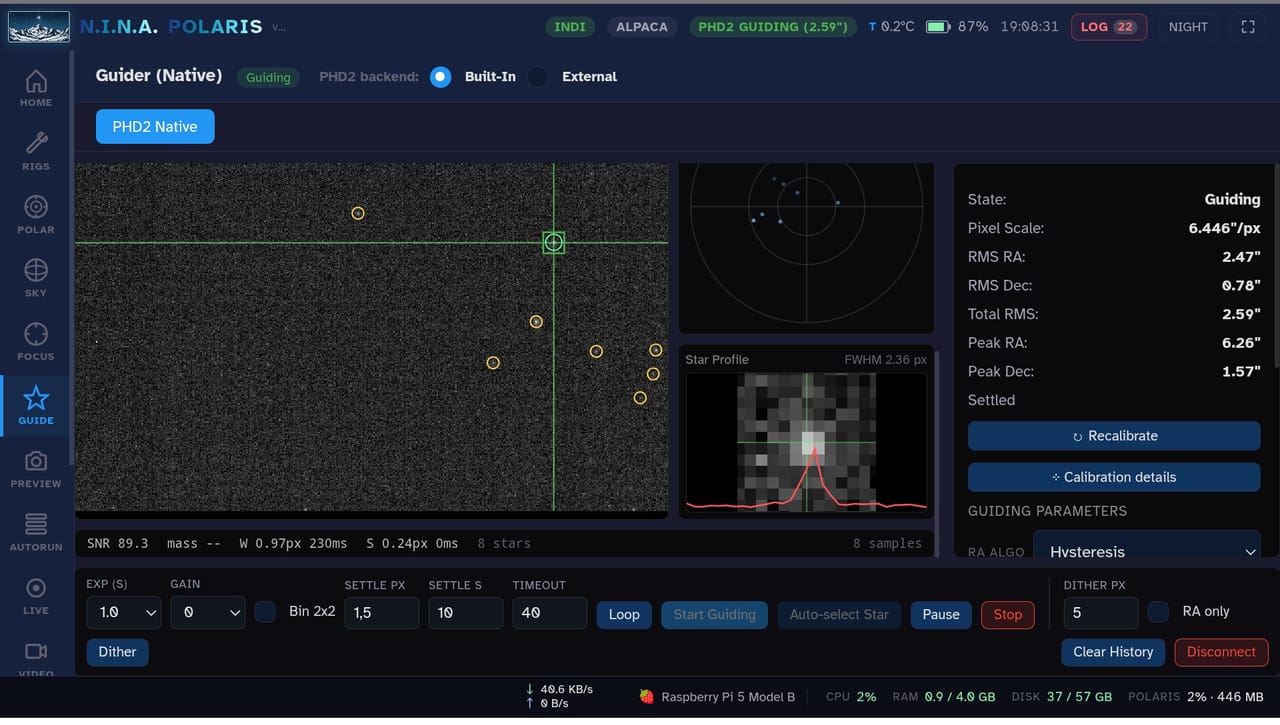
Switch to GUIDE. Click Launch PHD2 (or Connect if it is already running) and pick the profile that matches your guide camera and mount. Click Connect equipment, then Loop, Find Star, and Smart Calibrate. Watch the RA/Dec graph settle, and guiding then runs in the background all night.
TipPrefer the original PHD2 interface? Open the PHD2 GUI tab to drive the real app embedded over xpra or VNC.
Open FOCUS and run V-curve auto-focus: set the step size and sample count for your focuser and hit Start AF. Polaris samples several positions, fits the HFR curve, and parks the focuser at the sharpest point. You can also focus manually with the stepper buttons while watching HFR drop.
TipLower HFR means tighter stars. The sequencer can re-focus automatically when temperature or HFR drifts during the night.

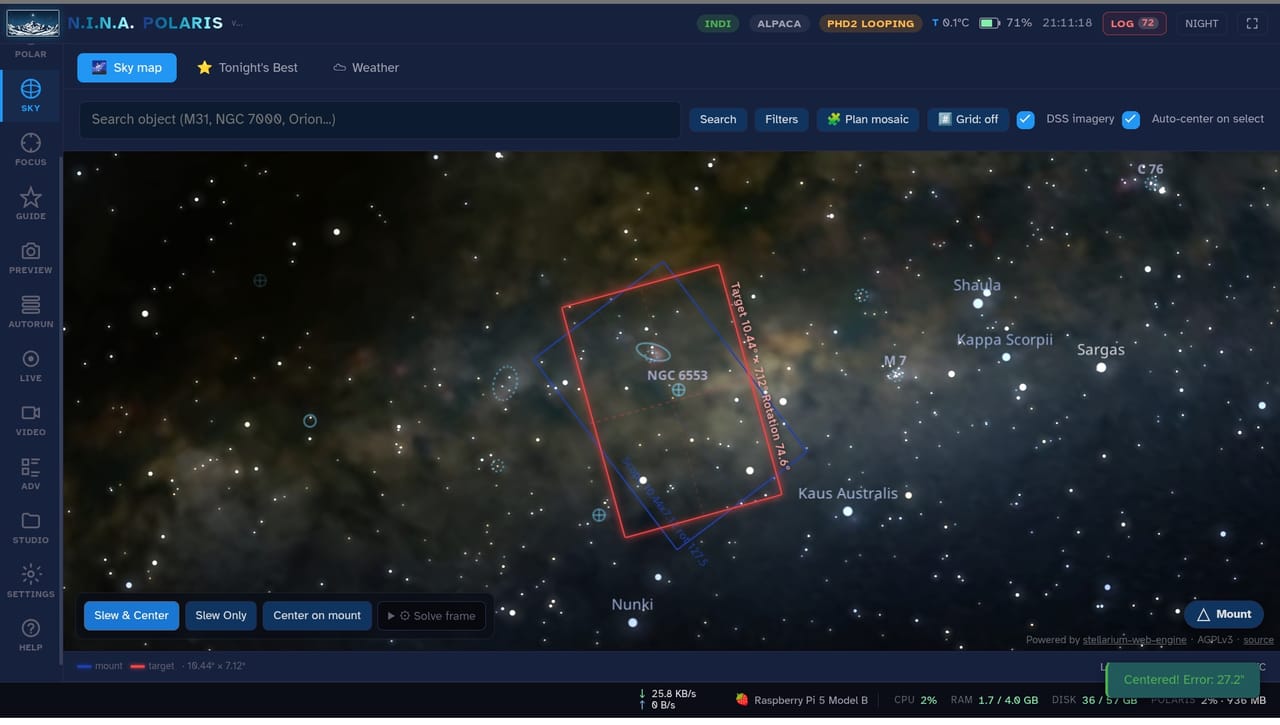
Open SKY and search for your target (M31, NGC 7000, and so on), or pick a suggestion from the TONIGHT tab ranked by altitude. Click the target, then Slew & Center: Polaris slews, plate-solves, and re-slews until the target sits centered inside the field-of-view overlay.
TipSlew & Center uses the Stellarium Web Engine sky explorer with full mount integration, no hand controller needed.
Two ways to shoot, and you can mix them. For instant EAA-style results, open LIVE and toggle Stack ON: the integrated image builds up live as each frame lands. For a full imaging run, open AUTORUN, add a target row (filter, exposure, count), enable dithering and meridian flip if needed, set your end-actions, and hit Start sequence. Subs are saved to disk for stacking later, and you can still watch them arrive in LIVE.
TipYou can close the browser and walk away. The server keeps capturing, so come back in the morning to a folder full of subs.
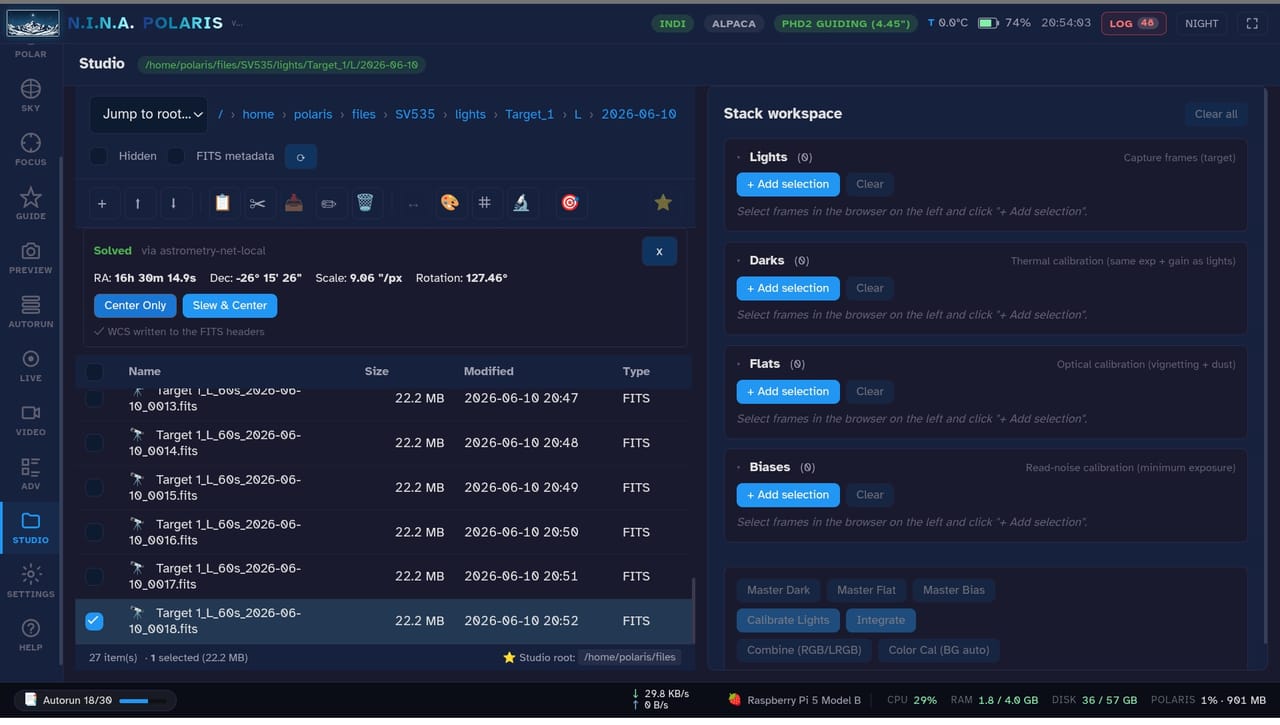
Open STUDIO to turn your subs into a finished image: build master calibration frames, calibrate the lights, and Integrate them into a master. Clean it up with GraXpert AI in the browser (background extraction, then denoise, then deconvolution, accelerated on the client GPU or the SBC's NPU). Polish tone and color in the EDITOR, then Export as JPEG, PNG, or 16-bit TIFF.
TipTurn on Auto-GraXpert BGE in the autorun end-actions and the background-extracted frames are ready before you even open STUDIO.
This is the speed run. Each tab has a deeper reference, and the install guide covers every optional tool you can add.