Two ways in: write a ready-made image to a card, or download the build for your machine and run a couple of commands. After that, add only the extras you actually want. Polaris looks around at startup and simply hides what is not there, so nothing nags you to install something you do not need.
Whichever path you take, the app is the best way to use Polaris at the scope: it finds every Polaris on your network by itself and keeps the screen awake during a session. A browser works too if you would rather not install anything.
The quickest way to start: pick your board below, write the image to a card, and turn it on. Polaris is already installed and set up, there is nothing to configure. Write the image with Raspberry Pi Imager, balenaEtcher or Rufus. The files live on Google Drive, and a new board appears here once it has been tested.
📡
Turn the board on and it just works. Polaris starts by itself: no setup, no account, nothing to install. If the board has WiFi and does not recognise any network around it, it creates one of its own, called Polaris-Hotspot-XXXX (the password is polaris1234). Connect your phone or laptop to that network and open Polaris in the browser.
🔎
How do I open Polaris? The easiest way is the phone or tablet app, for Android and iOS. It looks for boards on your network by itself and lists the ones it finds, so you do not have to know any address: open the app, tap your board, done. It also remembers several boards and keeps them in tabs. No app? Any browser works too. You open Polaris the same way you open a website, by typing an address. The address is your board's number. Open your router's page or app and look at the list of connected devices (often called DHCP or Clients). Your board is in there, with a number like 192.168.1.42. Type https://192.168.1.42:5000 in the browser, using your own number. A shortcut: on Raspberry Pi you can type the name instead, like https://polaris-pi.local:5000. Some Orange Pi images cannot do that, so there use the number. The browser will warn you about the certificate. That is expected and it is not a problem: the board signs its own, because it lives on your home network and not on the internet. Accept it once and it stops asking. Cannot find the board? It has probably not joined your WiFi yet, so it is still offering its own Polaris-Hotspot-XXXX. Connect to that hotspot (or plug in a network cable), then set your WiFi in Settings, Network.
🔄
The update button does not work? On a few of the older images the one-click update stops with a permission error. Nothing is broken and nothing of yours is lost: that image simply shipped with a rule its system ignores. You can update by hand instead. Connect with ssh polaris@192.168.1.42 (your board's number), then run wget https://github.com/DanWBR/NINA.Polaris/releases/latest/download/polaris_arm64.deb and sudo apt install ./polaris_arm64.deb. Your profiles, photos and settings all stay where they are.
🖥️
x86-64 PC / mini PC
x86-64
OS
Ubuntu 24.04.4 LTS (x86-64)
Polaris
0.98.102 (2026-09-16)
Size
3.09 GB (.7z)
The fastest way to run Polaris, and free if you already have a mini PC or an old laptop lying around. Extract the .7z, write the .img to a USB stick with balenaEtcher or Rufus, and boot from it. Once it is running, sudo polaris-install-to-disk copies everything to the machine's internal drive so you can take the stick out.
The slowest board on this page, and still enough for a normal night: capture, guiding, plate solving and live stacking all work. Big sensors and the AI tools are where you feel it. Extract the .7z and write the .img with Raspberry Pi Imager, balenaEtcher or Rufus.
Roughly twice as fast as the Pi 4 and the easiest board to find in a shop. A comfortable all-rounder if you already live in the Raspberry Pi world. Extract the .7z and write the .img with Raspberry Pi Imager, balenaEtcher or Rufus.
The cheapest way in. With 1.5 GB of RAM it handles capture, guiding and plate solving fine; live stacking a large sensor and the AI tools will test your patience. There is no GPU acceleration on this board, so the AI tools run on the CPU. Extract the .7z and write the .img to an SD card with HDD Raw Copy Tool, balenaEtcher or Rufus. Login password: polaris.
The one to buy if you are not sure. Around US$50, comfortably quicker than a Pi 4, and the best balance of price and capability here. Extract the .7z and write the .img to the board's internal storage with HDD Raw Copy Tool, balenaEtcher or Rufus. Login password: polaris.
First boot, openhttps://polaris-opi4pro-1.local:5000/
Two and a half times a Pi 4, with GPU acceleration for the AI tools. Worth the money if background extraction, denoising and deconvolution are part of how you finish an image. Extract the .7z and write the .img with balenaEtcher or Rufus.
First boot, openhttps://polaris-opi5pro-1.local:5000/
The fastest board here, with both GPU and NPU acceleration. Choose it if you lean on the AI tools or stack big frames while you are still shooting. Extract the .7z and write the .img with balenaEtcher or Rufus.
First boot, openhttps://radxa-dragon-q6a.local:5000/
The same Polaris the images ship, as a plain package. Download the build for the machine that sits next to the telescope, then follow the steps for your platform just below.
Server (runs on the rig)
Install on the Raspberry Pi, SBC, or mini PC that controls your gear.
Once you have the files, here is the step by step for each platform. The published builds carry everything they need, so there is no runtime to chase.
Raspberry Pi & arm64 SBCs
.deb
The recommended path for any Debian or Ubuntu arm64 board: Raspberry Pi, Orange Pi, Radxa, and similar. The .deb creates the user, a systemd unit, the indi-web venv, apt dependencies, and a self-signed HTTPS cert.
Running at https://<hostname>.local:5000 in about 30 seconds. Manage it with: sudo systemctl status polaris, sudo journalctl -u polaris -f, sudo systemctl restart polaris.
Mini PC, full stack (recommended)
one command
Install Ubuntu with its own installer (it partitions the SSD properly and uses all of it), then run one command. This adds everything the ready-to-flash image has and the .deb alone does not: INDI with third-party drivers, PHD2, astrometry.net, ASTAP with the d80 database, and Polaris itself. It is the very script the image is built from, so the two cannot drift apart.
No 13 GB image to write to an internal disk. Add --addon to install the software on a machine you already use, without creating the polaris user, autologin, hostname or sleep policy. Pick Ubuntu 26.04 LTS or a derivative of it for the full INDI driver set: since August 2026 the INDI PPA builds INDI only for 26.04. On 24.04 or 22.04 the script still works, installing Ubuntu's own INDI plus the third-party drivers the Ubuntu archive carries (ZWO, EQMod, DSLR, PlayerOne and others), and Polaris drives ZWO, SVBony, PlayerOne, ToupTek and Altair cameras natively without INDI.
x86-64 PC (Debian / Ubuntu)
.deb
The same one-command install for any 64-bit Intel or AMD PC or mini PC running Debian or Ubuntu. Sets up the user, systemd unit, indi-web, dependencies, and HTTPS cert, exactly like the SBC build.
Running at https://<hostname>.local:5000 in about 30 seconds, managed by systemd; same status, journalctl, and restart commands as the arm64 build.
Other Linux (portable)
tar.gz
For Fedora, Arch, or any non-Debian distro, or when you prefer no systemd integration. Replace linux-arm64 with linux-x64 for Intel/AMD.
wget https://github.com/DanWBR/NINA.Polaris/releases/latest/download/polaris-linux-arm64.tar.gz
tar -xzf polaris-linux-arm64.tar.gz
cd polaris-linux-arm64
./NINA.Polaris
Runs in the foreground. Wire your own service unit if you want it to survive reboots.
Windows mini PC
.zip
Portable, no installer. ARM64 build also available (polaris-win-arm64.zip) for Surface Pro X and some Copilot+ PCs.
Invoke-WebRequest -Uri "https://github.com/DanWBR/NINA.Polaris/releases/latest/download/polaris-win-x64.zip" -OutFile polaris.zip
Expand-Archive polaris.zip
cd polaris-win-x64
.\NINA.Polaris.exe
Open https://localhost:5000 and accept the self-signed cert once. Remember to open the firewall (see below). For a camera on its own USB driver (ZWO ASI, ToupTek, Altair, SVBony, Player One), install the maker's Windows driver and Polaris will find it; ASCOM and INDI cameras need nothing extra.
Mac (Apple Silicon / Intel)
.tar.gz
New in 0.98.66, and a contributor has since run it on a Mac against a local indiserver: a cooled ZWO camera, an AM5 mount, an EAF focuser and a guide camera, all connected and working. It is still young, and the Linux-only extras are absent, so tell us what you find.
curl -LO https://github.com/DanWBR/NINA.Polaris/releases/latest/download/polaris-osx-arm64.tar.gz
tar -xzf polaris-osx-arm64.tar.gz
cd polaris-osx-arm64
xattr -dr com.apple.quarantine .
./NINA.Polaris
Open https://localhost:5000 and accept the self-signed cert once. The xattr line is there because the download is unsigned. Equipment on macOS is Alpaca, INDI (a local indiserver from Homebrew, or a remote one on a Pi) and the native camera SDKs; ASCOM stays Windows-only. Drop a vendor .dylib next to the binary, or point POLARIS_NATIVE_SDK_DIR at it, and the native camera drivers appear in RIGS. On an Intel Mac replace osx-arm64 with osx-x64.
Docker
multi-arch
Multi-arch image (arm64 + amd64). The compose file in the repo includes indiserver in the same stack.
Volumes mount /config (profiles) and /images (FITS output). On Linux use --network host, or port-forward TCP 5000 and UDP 5353 in compose.
Build from source
dev
For developers or unsupported platforms. Needs the .NET 10 SDK and Git (with submodules).
git clone https://github.com/DanWBR/NINA.Polaris.git
cd NINA.Polaris
./deploy/publish-linux-arm64.sh   # or publish-linux-x64.sh / publish-win-x64.ps1
./publish/linux-arm64/NINA.Polaris
Build and test target net10.0. The stellarium-web submodule ships pinned .js/.wasm, so Emscripten is only needed if you bump the engine.
Keeping Polaris up to date
One-click in-app update
Recommended
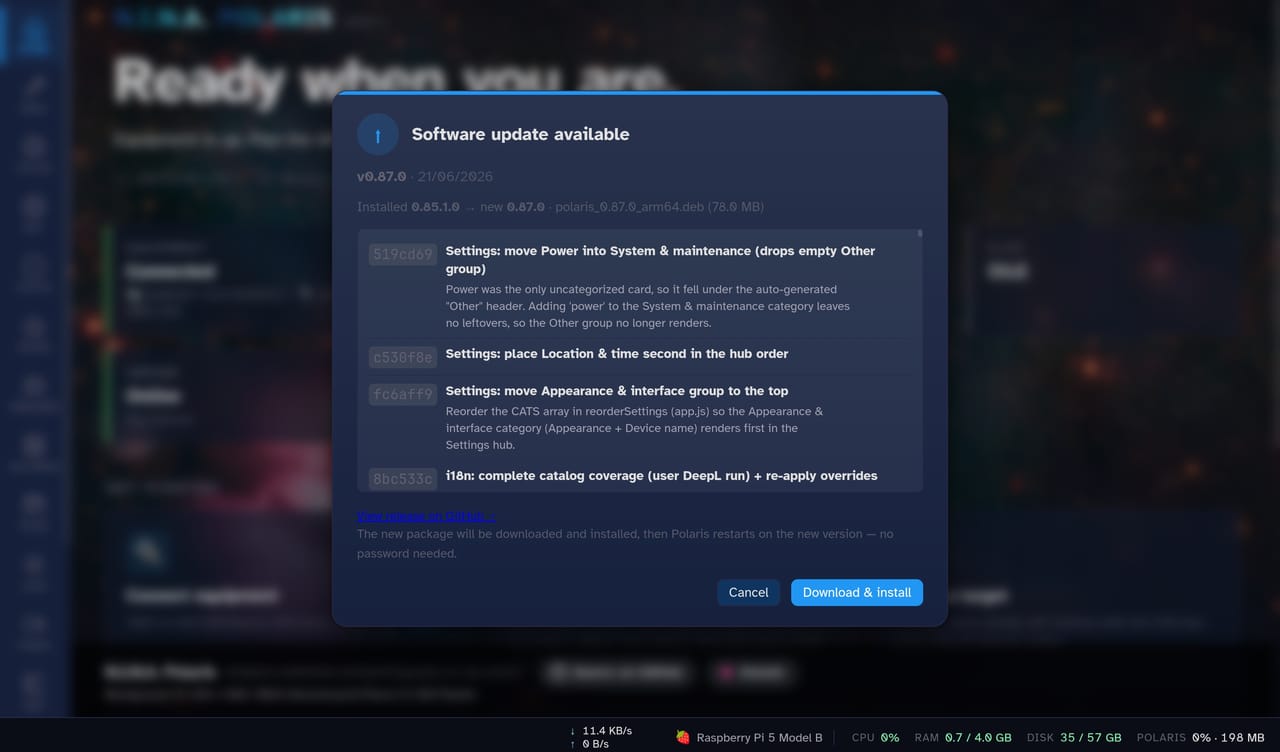
Every .deb install, including the ready-to-flash images above, can update itself. Polaris checks GitHub for new releases when it starts and once an hour after that. When there is a newer build for your board, a green Update badge shows up in the top bar with the version number. Click it to read what changed, then Download and install: Polaris fetches the right file, installs it and comes back on the new version. No SSH, no apt, no sudo password. Just leave the page open while it reloads itself. Your profiles and your photos stay exactly where they are.
System requirements
RAM is what really decides. Everything else is comfortable on any modern little board, and a few of them even lend a GPU or an NPU to the AI tools.
🧠
Polaris sizes the live stack to the board it is running on, picking full, half or quarter resolution so the work fits in a quarter of the memory. In round numbers: a 12 MP colour camera needs about 900 MB at full resolution and 450 MB at half, on top of a fixed 370 MB for everything else. 2 GB is comfortable, a 1.5 GB board works at reduced resolution, and if you would rather not spend the memory at all, the browser can do the stacking instead.
⭐
Recommended board: the Orange Pi 4 Pro with 4 GB. Best balance of cost and capability of every board tested so far, at around $50 to $70, with eight cores, a GPU and an NPU. The scores on this page come from our own benchmark, where a Raspberry Pi 4 sits at 110: the 4 Pro scores 180. If you want the most speed regardless of price, the Radxa Dragon Q6A leads at 317. If the AI tools matter most, the Orange Pi 5 Pro is the one whose acceleration is fully proven.
Host
RAM
Status
Notes
Raspberry Pi 3
1 GB
Below RAM target
Too little memory for live stacking and slow with everything else, but it will capture and guide. The built-in PHD2 window is not available on this board because its system is 32-bit. Broadcom BCM2837 (4x Cortex-A53 up to 1.2 GHz), VideoCore IV GPU.
Raspberry Pi 4
2+ GB
Minimum
The sensible floor. At 2 GB Polaris drops the live stack to a lower resolution on its own so it fits, and it can hand the heavy maths to your browser instead of the board. Broadcom BCM2711 (4x Cortex-A72 up to 1.8 GHz), VideoCore VI GPU, LPDDR4.
Raspberry Pi 5
2+ GB
Great
No compromises: live stacking and Studio jobs at the same time are fine. About twice the speed of a Pi 4. Broadcom BCM2712 (4x Cortex-A76 up to 2.4 GHz), VideoCore VII GPU, LPDDR4X.
Orange Pi 4 Pro GPU + NPU
2+ GB
Recommended
The best balance of price and capability here: the price of a Raspberry Pi 4 for about 1.6 times its speed (score 180). Add a fan, it keeps the clocks up through a long night. GPU and NPU acceleration work as on the 5 Pro, though we have not finished testing them on this board. Allwinner A733 (2x Cortex-A76 + 6x Cortex-A55 up to 2.0 GHz), Imagination BXM-4-64 GPU, 3 TOPS NPU, LPDDR5.
Orange Pi 5 Pro GPU + NPU
2+ GB
Great
The proven choice when you want the AI tools accelerated: both the GPU and the NPU are used. About 2.5 times a Pi 4 (score 274). RK3588S (4x Cortex-A76 + 4x Cortex-A55), Mali-G610 GPU, 6 TOPS NPU.
🐉 Radxa Dragon Q6A Top score
4+ GB
Fastest
The fastest board tested so far, close to three times a Pi 4 (score 317), and all of it from the CPU. The AI tools use its NPU. The GPU is left alone because it did not make anything faster here. Qualcomm QCS6490 (octa-core Kryo: 1x 2.7 GHz + 3x 2.4 GHz + 4x 1.9 GHz), LPDDR5.
🖥️ Windows mini PC / desktop / laptop
4+ GB
Full features
Everything Linux does, plus the vendor drivers for DSLRs. Cameras with their own USB driver need the maker's Windows driver installed; ASCOM and INDI cameras do not.
Mac (Apple Silicon / Intel)
4+ GB
Needs testing
Self-contained builds ship since 0.98.66. Equipment is Alpaca, INDI and the native camera SDKs; ASCOM is Windows-only, and the Linux extras (WiFi setup, power, host clock) are not there. A contributor now runs it on a Mac against a local indiserver, with a ZWO camera, mount, focuser and guide camera all connected.
Bare minimum to boot
Windows
Linux (RPi / x64)
Runtime
.NET 10 Desktop Runtime (bundled in the self-contained build)
.NET 10 Runtime, or use the self-contained build
Polaris binary
NINA.Polaris.exe
NINA.Polaris
Network
TCP 5000 open on the LAN
TCP 5000 open on the LAN
That is everything the home page needs. Each of the other features brings its own tool, listed under optional components below, and you add them only when you want that feature.
Open the firewall
Polaris listens on TCP 5000 (the interface) and UDP 5353 (mDNS, which is what makes the <hostname>.local address work). Most systems block both until you say otherwise.
Required for Slew & Center (the centering loop). Without any solver, Slew Only still slews the mount. Polaris dispatches primary then blind fallback across whatever is installed.
ASTAP
recommended
Default solver. Fast (about 1 to 3 s), works offline, MIT. Recommended for everyone.
Windows
astap.exe installer + the H17/H18 star database (~2 GB).
Polaris guides out of the box with a built-in, native PHD2, so there is nothing to install for basic guiding.
PHD2 (optional, the original app)
optional
Prefer the real PHD2 over the native implementation? Install it on Windows or Linux, and Polaris drives it from inside the browser through an embedded remote view, no second screen needed. It still auto-detects PHD2, swaps profiles, runs Smart Calibrate, and broadcasts guide stats in real time.
Reach your rig from anywhere without exposing it directly. Reverse-tunnels over HTTPS with per-tenant tokens, mTLS, quotas, and built-in Let's Encrypt.
Windows
Host NINA.Relay.Server on a public VPS (Linux). The rig side needs nothing extra.
Linux
Run the Linux x64/arm64 build on a VPS with a domain and ports 80/443 open.